Professional Planning Engineer (PPE) Course
Become a confident, high-performing Planning Engineer with advanced skills in planning, scheduling, monitoring, control, and reporting —
built around real construction workflows and practical tools.
- Best for: Planning Engineers, Planners/Schedulers, Planning Managers, Project Controls staff
- Level: Advanced (recommended after Basic & Intermediate if you’re new)
- Certificate: Yes (downloadable completion certificate)
Instructor: Hany Ismail — Planning Director & Trainer
| Recorded Videos 16 Hours | Practicing Time 34 Hours |
| Access Lifetime Access | Prerequisites (Recommended) Construction Project Planning (Intermediate Level) with P6 + Excel |
Enroll Now
If you don’t have an account, it will be created automatically during checkout.
Course Overview
The Professional Planning Engineer (PPE) course is designed to equip planning engineers with the practical knowledge and advanced techniques
to plan, monitor, control, and report real construction projects effectively.
This course focuses on turning theory into usable systems and tools you can apply immediately on-site or in project controls teams.
Who Needs This Course?
This is an advanced course for Planning Engineers who want to upgrade their planning and scheduling skills.
If you are junior or new to planning, we recommend completing the Basic and Intermediate levels first.
Course Contents

Project Management Plan (Real Case Study)
This workshop is not only study materials and quizzes — it includes a full practical project management development plan.
You will create a project from scratch, using smart planning techniques designed to save time and increase accuracy.
Case study scope: 164 buildings, 170 villas, external works, infrastructure, landscape — worth 600+ million USD.
You will strengthen skills such as:
- Time Management (detailed construction schedule)
- Resource & Cost Loading (utilization and control)
- Labor Management (productivity monitoring)
- Procurement Tracking (materials log and monitoring)
- Shop Drawings Tracking (logs and progress monitoring)
- Progress Reporting (reports tailored to stakeholders)
Workshop Duration and Study Method
The course is designed as an 8-week structure (to reduce study pressure), but it is also self-paced.
You get access to the full portal content from day 1 and can revisit materials anytime.
“Access to the course curriculum will be made available instantly once the course registration fee has been paid.”
What You Will Get From This Course

- All study materials including special planning Excel tools
- Unlimited online access to all course content
- Step-by-step guide to build a functional mega-project schedule and control system
- Includes: schedule, cost/resource loading, procurement strategies, budgeting methods, mini schedules, productivity rates, planned quantities, and more
- Practical time-saving Excel tools to reduce repetitive work
- Activity Bank + Relationships to reuse across projects
- Productivity Bank to estimate labor force requirements
- Specially developed mobile application (iOS & Android)
- Upload Excel sheets and view progress of tasks
- Reminder emails to project team members via the app
- Monitoring, controlling & reporting templates + dashboards and data-connection methods
- Access to support email & WhatsApp
- Support team answers questions and provides solutions to student problems
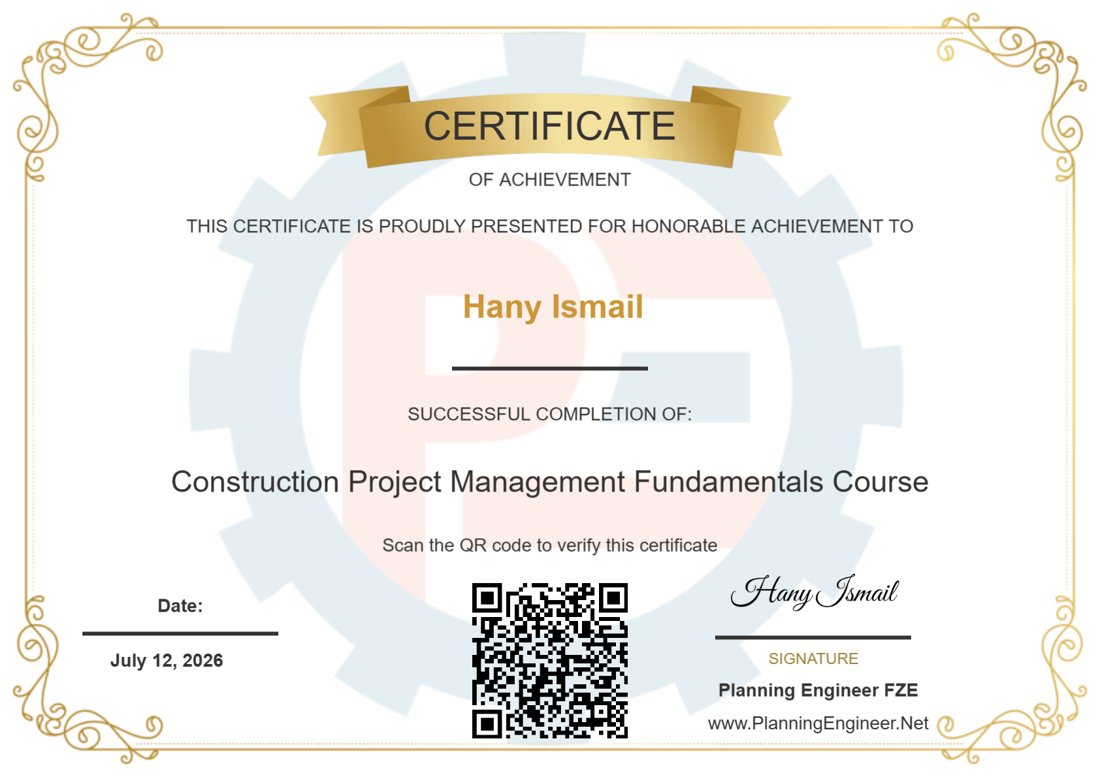
Certificate of Completion
Completing this course and receiving the certificate can strengthen your professional reputation and help you stand out in the job market.
It provides tangible evidence of your skills and supports your career growth in planning, project controls, and reporting.
Course WhatsApp Support Group
All enrolled trainees get an invitation to the PPE WhatsApp support group, where our team answers your questions about the lessons, Primavera P6 and Excel tools. The invitation link appears at the top of every lesson after you enroll.
Download Course Contents:
Interested in a Better Value Package?
This course is included inside our Advanced Planning Package (plus two additional professional courses and bonuses).
If you want maximum value, check it here:
Advanced Planning Package
Articles Library (Continuously Updated)
We Believe in Continuous Improvement – Making Planning Easy for You!
Driven by your questions and feedback, we built an ever-growing Articles Library to support your learning journey.

Resource Dependent Activities in Primavera P6
Date Created: June 17, 2025 | 703 downloads
Concurrent Delays in Construction Projects
Date Created: June 16, 2025 | 652 downloads
Liquidated Damages in Construction Projects
Date Created: May 22, 2025 | 930 downloads
Decrease the Total Float of Preconstruction Activities using As Late As Possible Constraint
Date Created: May 14, 2025 | 460 downloads
What Activities Must Be Completed Before Starting Physical Construction on Site
Date Created: May 11, 2025 | 1456 downloads
How to Add Holidays to P6 Calendar?
Date Created: May 11, 2025 | 1300 downloads
How to Introduce Yourself in a Planning Engineer Interview
Date Created: May 11, 2025 | 1576 downloads
The Application of Start-to-Finish [SF] Relationship in Primavera P6
Date Created: May 4, 2025 | 597 downloads
How to Verify the Progress % Complete of Activities Reported by the Contractor
Date Created: April 23, 2025 | 1385 downloads
The Applications of Negative Lags
Date Created: April 22, 2025 | 1212 downloads
Join Now
Complete checkout to activate your access. If you don’t have an account, it will be created automatically during checkout.
Course Features
- Lectures 39
- Quiz 0
- Duration 50 hours
- Skill level All levels
- Language English
- Students 2020
- Certificate Yes
- Assessments Yes
Curriculum
- 12 Sections
- 39 Lessons
- Lifetime
- Wk-1 How to study the project and settle the planning concept5 Items
- WK2- Prepare B.O.Q for Planning7 Items
- 3.1Check what was wrong in week 1 documents10 Minutes
- 3.2Introduction – Prepare B.O.Q for Planning5 Minutes
- 3.3Know how to work with excel macros in 10 MIN Only10 Minutes
- 3.4Prepare B.O.Q ( Add Ref. No & Merge Items description )31 Minutes
- 3.5Prepare B.O.Q ( Add Div. No. & Add main Title for BOQ Items )34 Minutes
- 3.6Prepare B.O.Q ( Combined all BOQ Items in one sheet )13 Minutes
- 3.7Check your calculations26 Minutes
- Wk3- Planning in Excel5 Items
- WK4- Planning in Primavera5 Items
- 5.1Create project schedule in excel ready for primavera import66 Minutes
- 5.2Import activities with relationships from excel to primavera part 195 Minutes
- 5.3Import activities with relationships from excel to primavera part 280 Minutes
- 5.4Import activities cost and resources from excel to primavera35 Minutes
- 5.5Import Materials, Shop Drawings activities, and learn how to link activities in Excel58 Minutes
- WK5- Monitor the project progress, project resources, and productivity2 Items
- Wk6- Controlling the project3 Items
- Wk7- Project reporting3 Items
- WK8- Re-Planning4 Items
- Sample Real Projects1 Item
- Completion Certificate1 Item
- Share success and leave a review1 Item
- Support Articles Based on your Requests1 Item
Articles library
Practical articles and downloadable files for trainees on this course. New articles are added regularly.
Resource Dependent Activities in Primavera P6
Date Created: June 17, 2025 | 703 downloads
Concurrent Delays in Construction Projects
Date Created: June 16, 2025 | 652 downloads
Liquidated Damages in Construction Projects
Date Created: May 22, 2025 | 930 downloads
Decrease the Total Float of Preconstruction Activities using As Late As Possible Constraint
Date Created: May 14, 2025 | 460 downloads
What Activities Must Be Completed Before Starting Physical Construction on Site
Date Created: May 11, 2025 | 1456 downloads
How to Add Holidays to P6 Calendar?
Date Created: May 11, 2025 | 1300 downloads
How to Introduce Yourself in a Planning Engineer Interview
Date Created: May 11, 2025 | 1576 downloads
The Application of Start-to-Finish [SF] Relationship in Primavera P6
Date Created: May 4, 2025 | 597 downloads
How to Verify the Progress % Complete of Activities Reported by the Contractor
Date Created: April 23, 2025 | 1385 downloads
The Applications of Negative Lags
Date Created: April 22, 2025 | 1212 downloads
Questions & answers
Answers from our team to questions students ask in the course support group.
General
QWhere are the input and output files for each lesson?
All course resources are downloadable inside each lesson, under the video: the input files you start with and the output files with the finished result.
QAs a main contractor, my manhours differ from my subcontractor's Level 4 schedule. How do I align them?
Manhours and equipment hours come from two inputs: quantities and productivity rates. Make sure you and your subcontractor build the schedules on the same BOQ, then agree on the productivity rates – the hours will then match.
WK2- Prepare B.O.Q for Planning
QThe BOQ calculation-check file is missing from the lesson. Where can I download it?
Refresh the lesson page, or download it directly: BOQ Bank (ZIP).
QThe Combine BOQ macro copies only one row from some sheets. What should I do?
Use this prepared version of the BOQ file and the macro will work for all sheets: B.O.Q Future City – to be combined (Excel).
Wk3- Planning in Excel
QWhere can I get standard productivity rates for other trades (e.g. mechanical piping and equipment installation)?
Use our Productivity Rates PC Software. It covers construction activities across divisions. Once purchased it is fully functional, and future updates and rate changes are provided free of charge. Check the prerequisites on the product page before installing.
QIs productivity calculated per labourer or per crew, and how many labourers are in a crew?
Both work – it depends on the output you need. If you rate each labourer, you get hours per trade directly. If you rate the crew, split the crew hours between its members by an assumed share of the workload.
Example: crew hours for an activity = 100 hrs; crew = A, B, C with A 50%, B 25%, C 25% ⇒ A = 50 hrs, B = 25 hrs, C = 25 hrs. If the activity lasts 1 day of 10 working hours, you need 5 workers of type A.
For 1 technician + 2 helpers you could use 50% technician and 50% helpers (split equally). For 2 crews, double the productivity rate. P6 then calculates hours per resource per month, which you can turn into a manpower histogram.
More: Smart way of doing resource loading and How to Create Manhour Histogram from Primavera P6 [Template].
QWhy is WBS Level 1 the buildings in the course? Can I use stages, then zones, then building types?
Yes, you can. There is no fixed rule for the WBS – it changes from project to project and with the construction method. Agree the structure with your stakeholders so it lets you monitor the schedule easily and reflects how you build. As long as the hierarchy meets the client's needs, both approaches are correct.
WK4- Planning in Primavera
QDoes importing relationships from Excel depend on the WBS being correct?
No. Importing relationships from Excel has no relation to the WBS. It only depends on the activity IDs of the predecessors and successors.
QMany activities are imported outside their WBS. Why?
The WBS path in the import sheet does not match the WBS path in P6. Double-check that each activity's WBS path in Excel is exactly the same as the WBS structure in your P6 project, then import again.
QThe WBS import from Excel to P6 does not work in newer P6 versions (v17 and later, e.g. P6 22). How do I fix it?
Newer P6 versions add a column to the WBS table, so the copied data shifts out of place. Check that:
- Your Excel columns match the P6 WBS table exactly, including the est_wt column (fill it with 1).
- seq_num is a unique sequence and guid is a unique identifier for every row.
- The data types and column alignment are correct.
- The Project ID is updated to your project before importing.
If the import still fails, send your Excel file and XER to the course WhatsApp support group.
QDo you plan procurement for every floor or work package in the programme, or only long-lead items?
- Procurement is planned per material, not per location. For example, if the same tiles go on every floor, add one procurement activity for that item. Long-lead materials are often kept apart from the others in the WBS.
QHow do you handle standard and repetitive materials, for example with a procurement log or a rolling look-ahead?
The same way as above: one procurement activity per material, not one per floor or area.
QHow do you set order-by dates, and do you link them to installation activities?
The procurement in the main schedule is kept at a high level. The detail goes in a separate document: the procurement tracking schedule. More reading:
WK8- Re-Planning
QShould milestones use mandatory constraints ("hard" milestones) or not?
Hard milestones use mandatory constraints (Mandatory Start / Mandatory Finish). They lock the milestone to a date regardless of logic, which can hide delays, misrepresent the critical path and make the schedule rigid.
Soft milestones use constraints such as Start On or After, Finish On or Before, Start On or Before and Finish On or After. They set a target without overriding the logic, so a slip in predecessors still shows as a delay.
Recommended practice:
- Drive milestones by logical relationships first.
- Use soft constraints for target dates.
- Keep mandatory constraints for exceptional, contractually fixed dates only – and document why in the schedule narrative.
The course case study uses them for demonstration; always follow your project's planning requirements.
QThe baseline start and finish dates do not match my schedule dates. Why?
Baseline columns only show correct dates after you assign a baseline to the project. If no baseline is assigned (or the current, updated schedule is used), the dates will not match the planned dates.
To create a clean baseline copy of an updated schedule (without actuals), see: Remove Primavera P6 Actuals using Global Change.
QI am new to planning. How do I create a recovery schedule?
Follow this step-by-step guide: How To Prepare Recovery Or Revised Schedule – 30 pages PDF guide. Then rewatch the Week 8 recovery schedule lesson and apply the steps on the course project.
Completion Certificate
QThe name on my certificate is wrong. How do I change it?
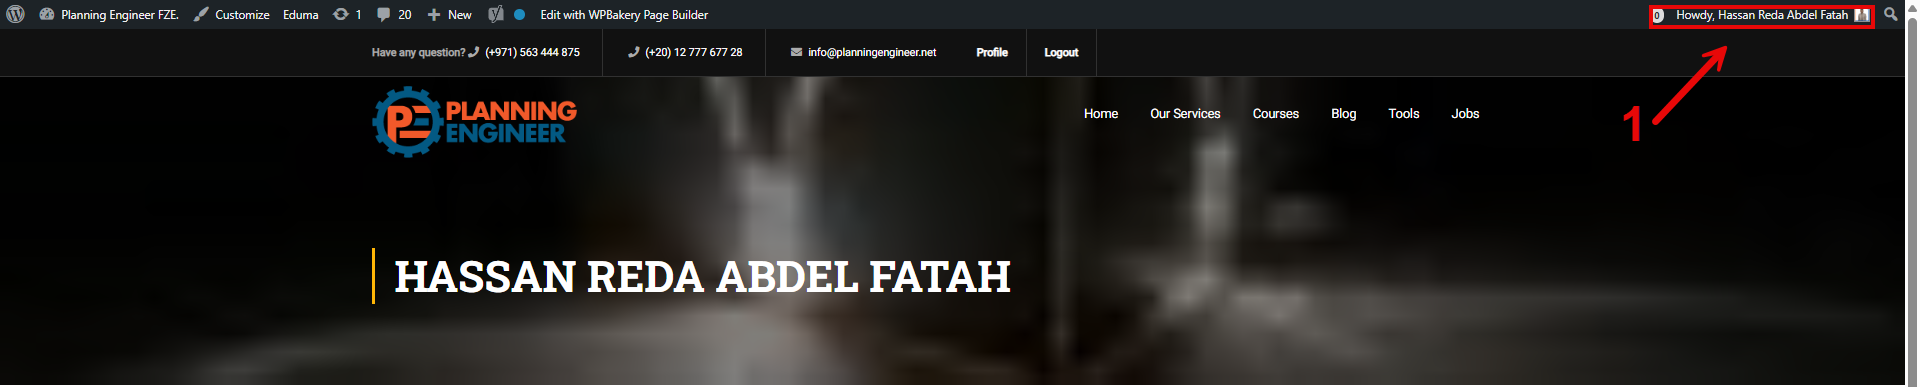
The certificate uses your profile name on the website:
- Click your name in the top-right corner of the website.
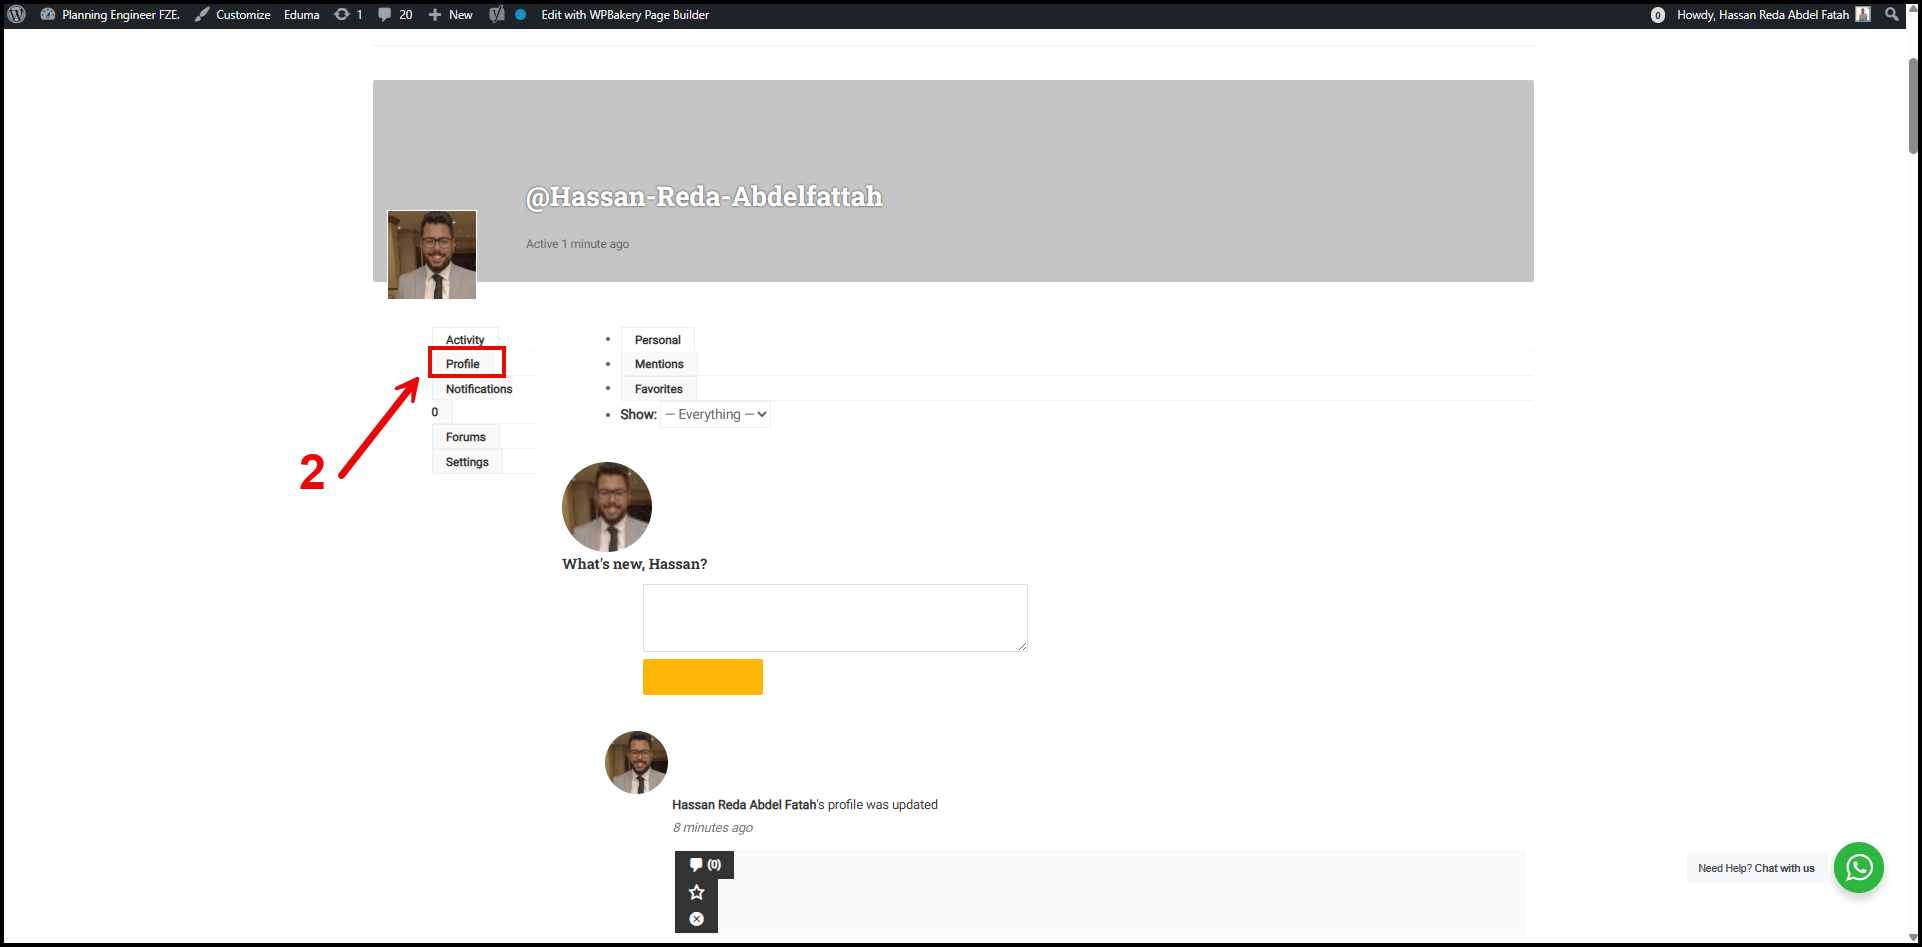
- Click Profile.
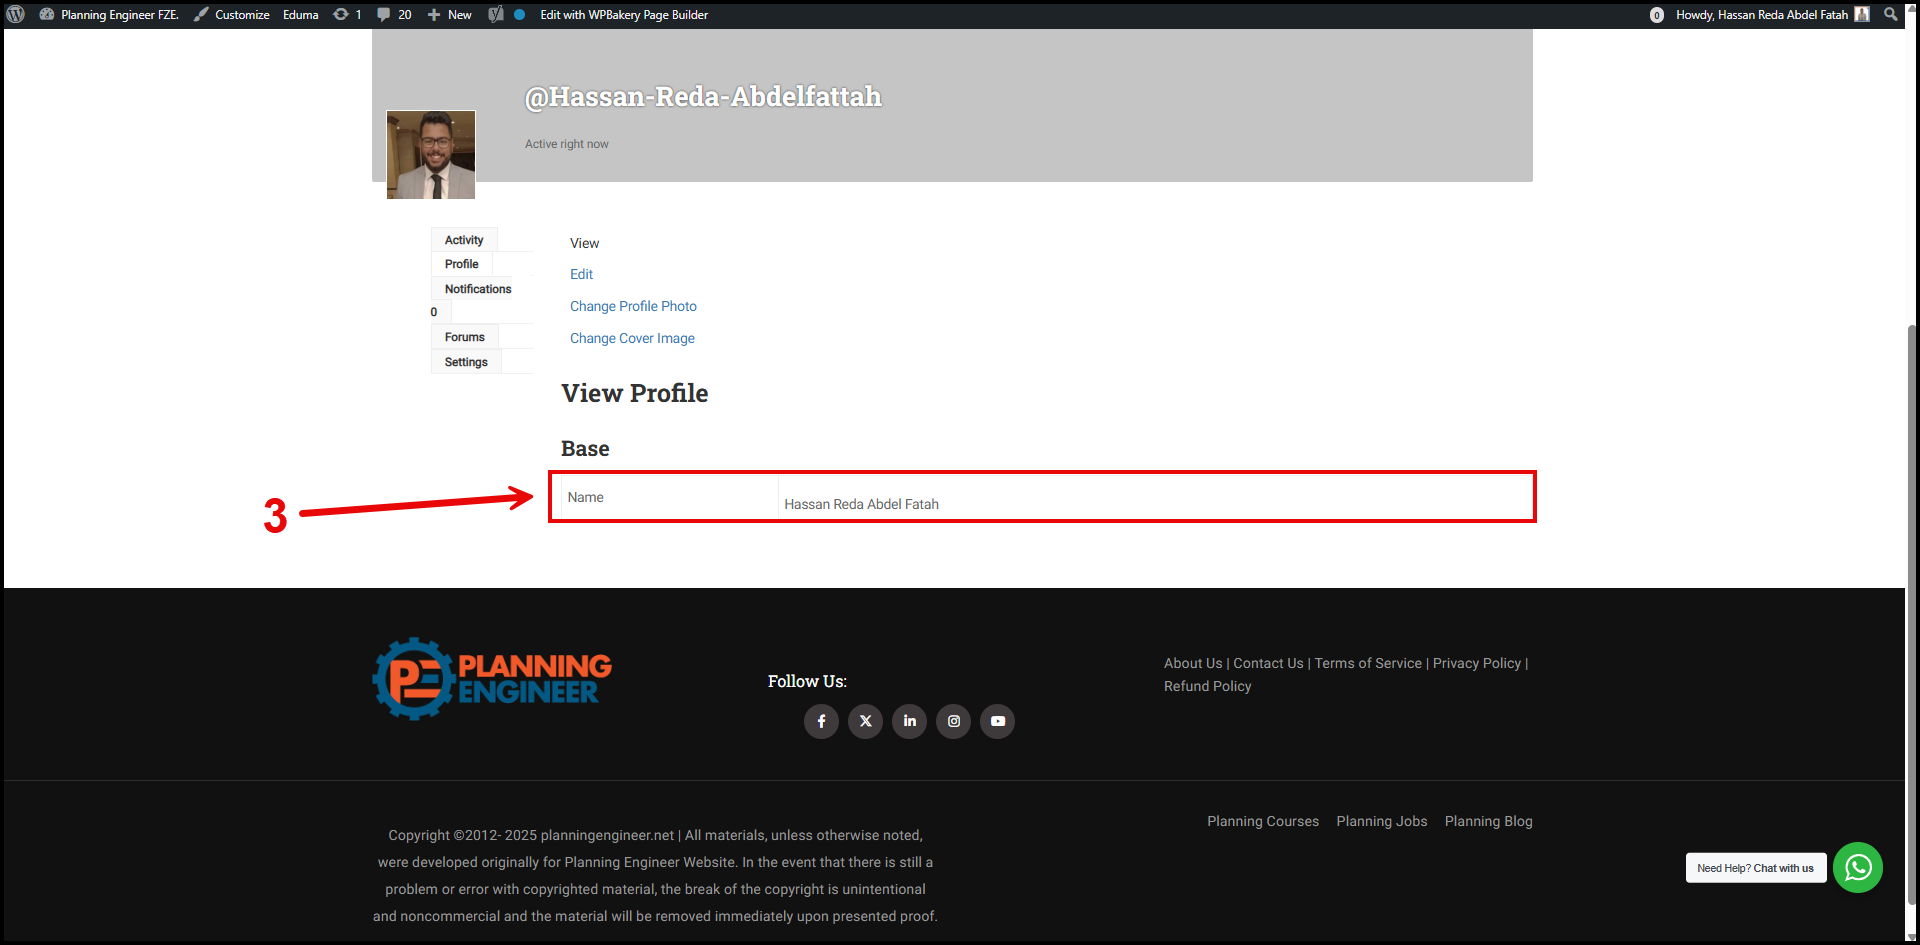
- Change your name in the Name box and press Enter.
- Open the certificate again – it shows the new name.
No questions match your search.