Step 1
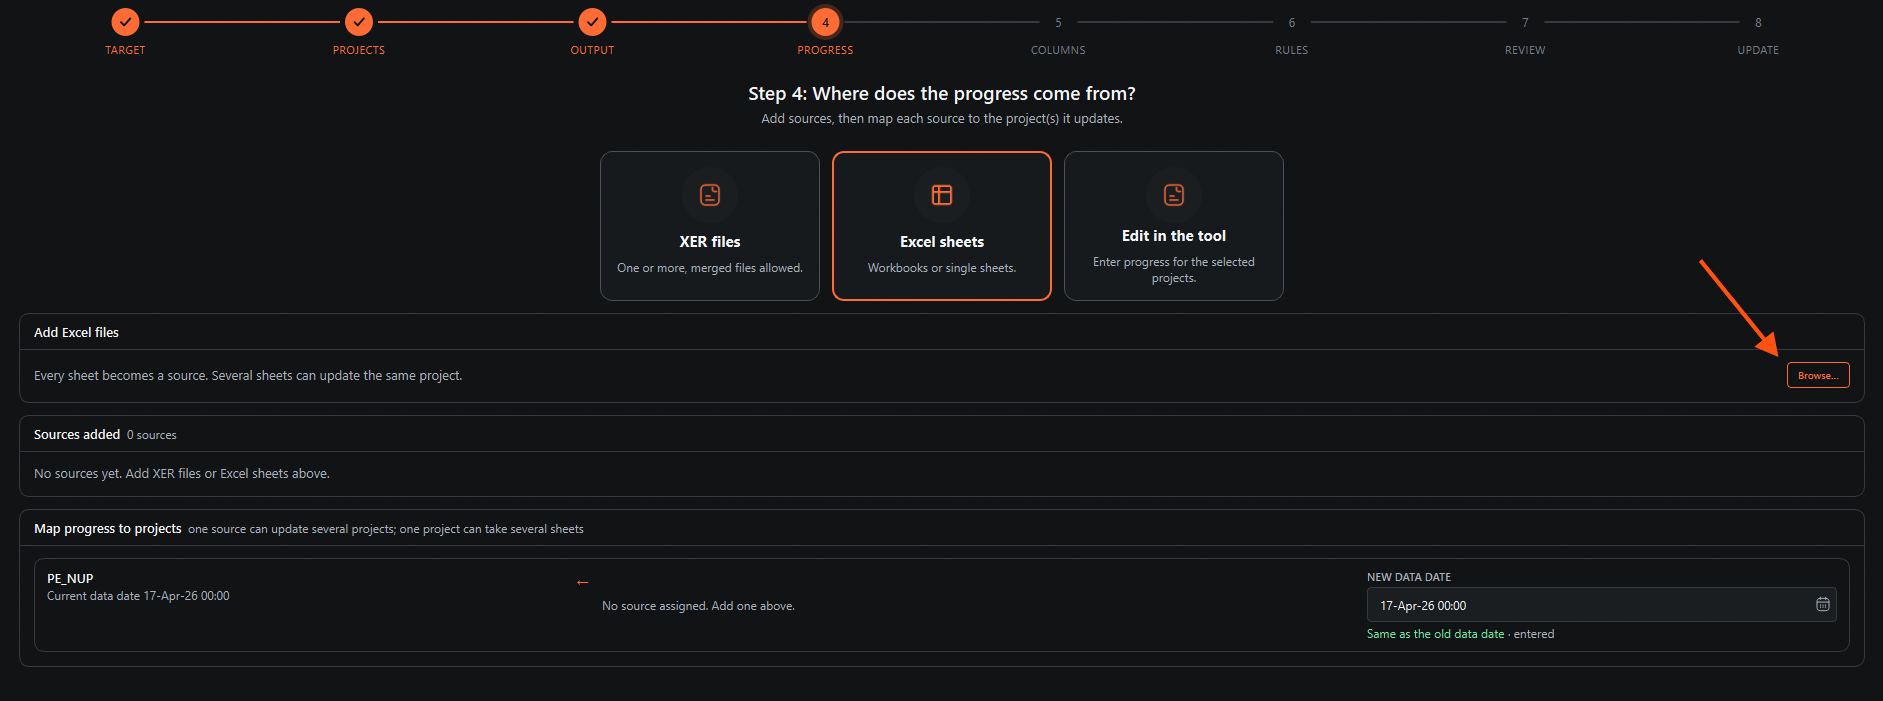
Before you start: complete Open the Schedule Update Tool and Select an XER Project.
Choose Excel Sheets and Browse to open the progress sheet path

Step 2
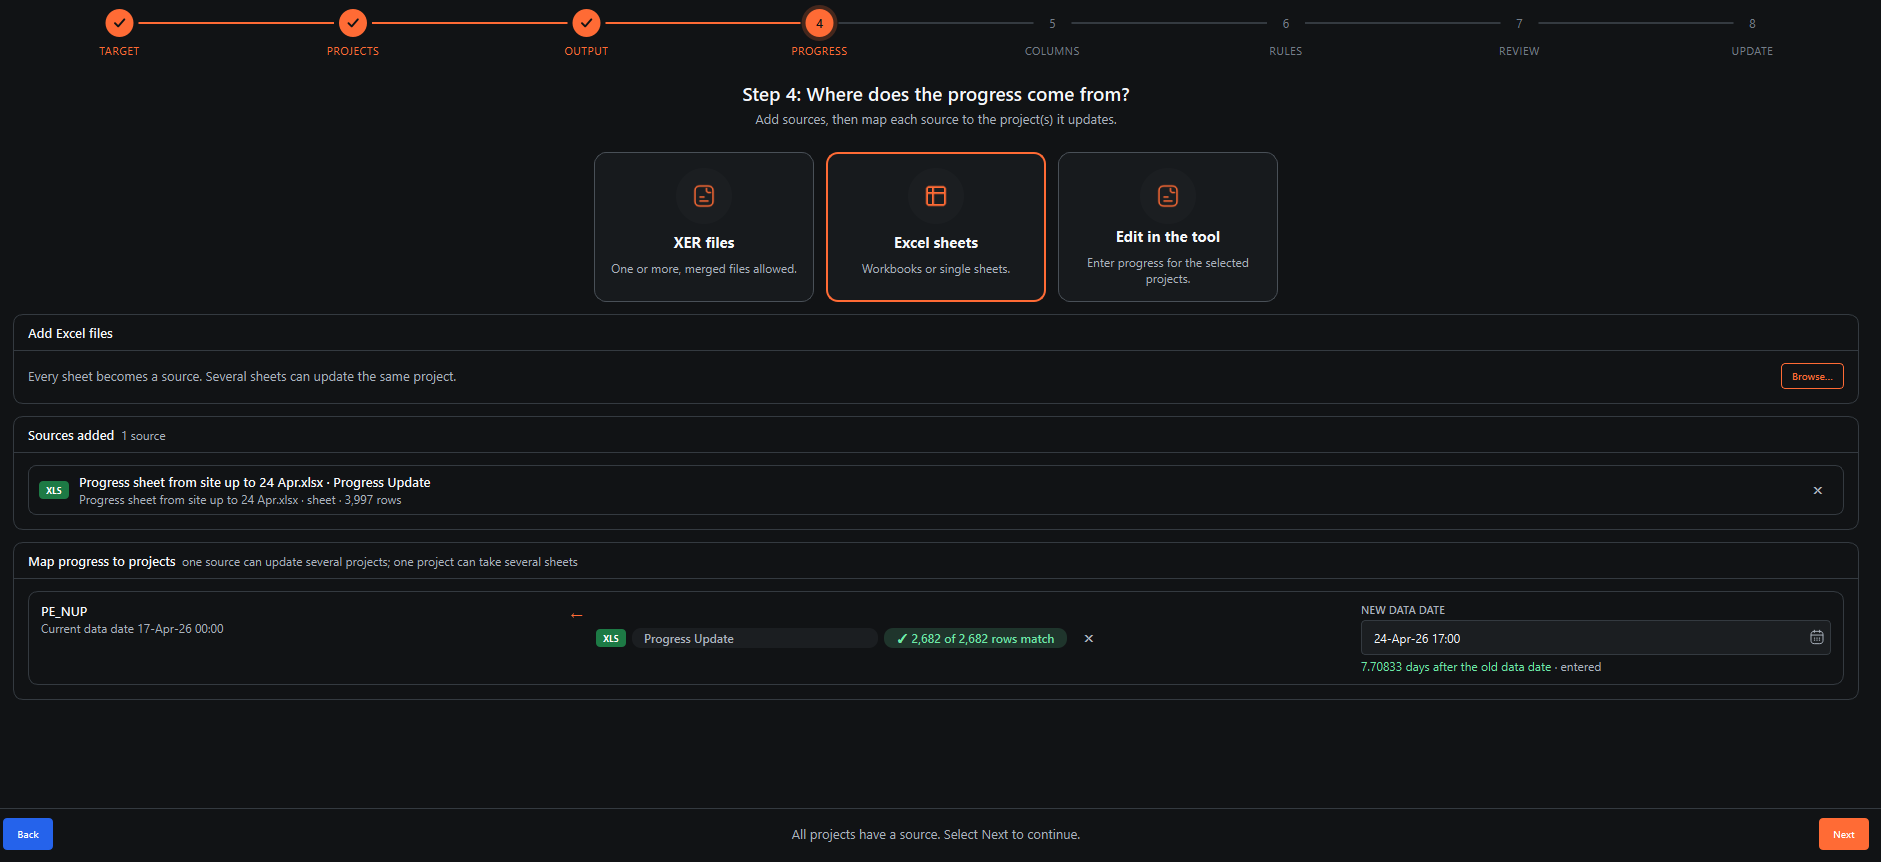
Select the progress sheet and open it

Step 3
Assign the new data date, then click the Next button

Step 4
This window shows the rules that the tool follows to update. If you do not want some rules to run, you can turn them off, then click the Run Verification button.


Step 5
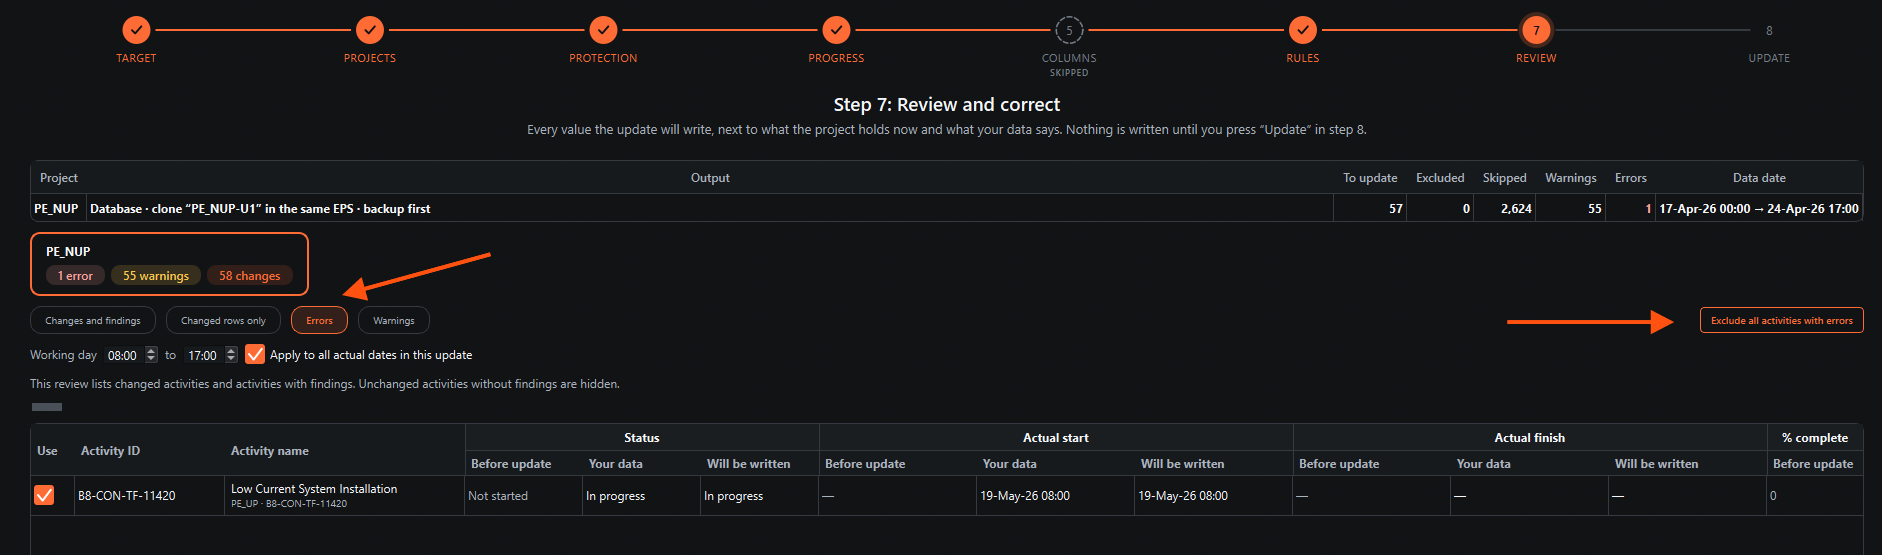
In this window, review the errors, warnings, and changes for the progress sheet. Set the working day if needed.

Step 6
If there are errors, click the Errors button to fix them, or click Exclude all activities with errors. Then click the Next button.

Step 7
Click the Update Project button

Next: Import in P6
Follow Import the Updated XER File to P6 to import the updated XER file into P6 and schedule it.
Update XER File from an Excel Progress Sheet
Update an XER file using the progress sheet received from site.
Guide 9 of 11 in Updating Tool