Open the Projects package
From the home page, click Open Package under Projects.

Open the EPS editor
If this is your first project, you need to create an EPS first. Click the EPS button in the toolbar.

Add a new EPS
Click + Add EPS.

Name your EPS
Type the EPS name, choose Root EPS (top level), then click Create EPS.

Save the EPS
Click Save EPS.
Note: Save the EPS first; otherwise it will not appear in the EPS list when you create the project.
Create a new project
Click the (+) button next to PROJECT in the toolbar.

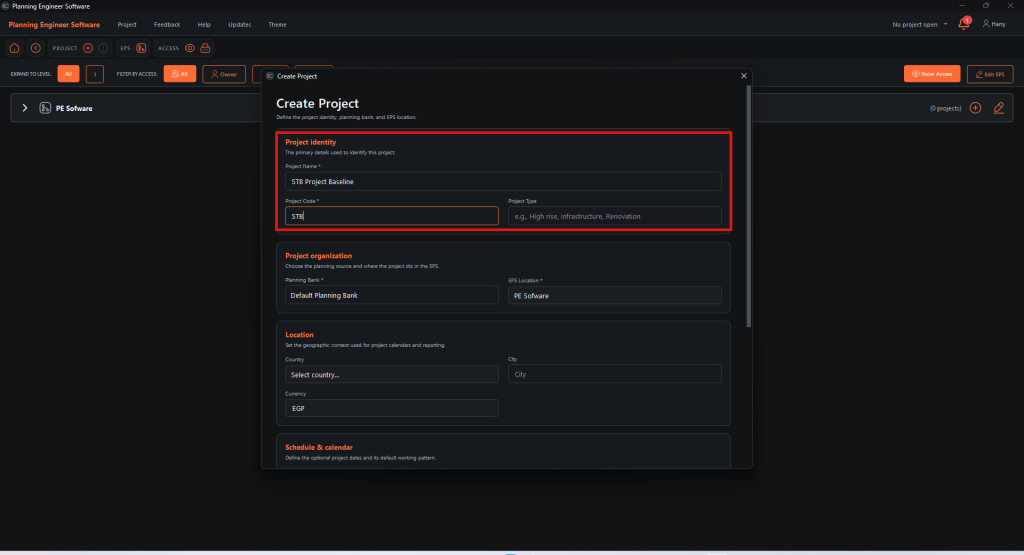
Project identity
Enter the Project Name and a unique Project Code. Project Type is optional.
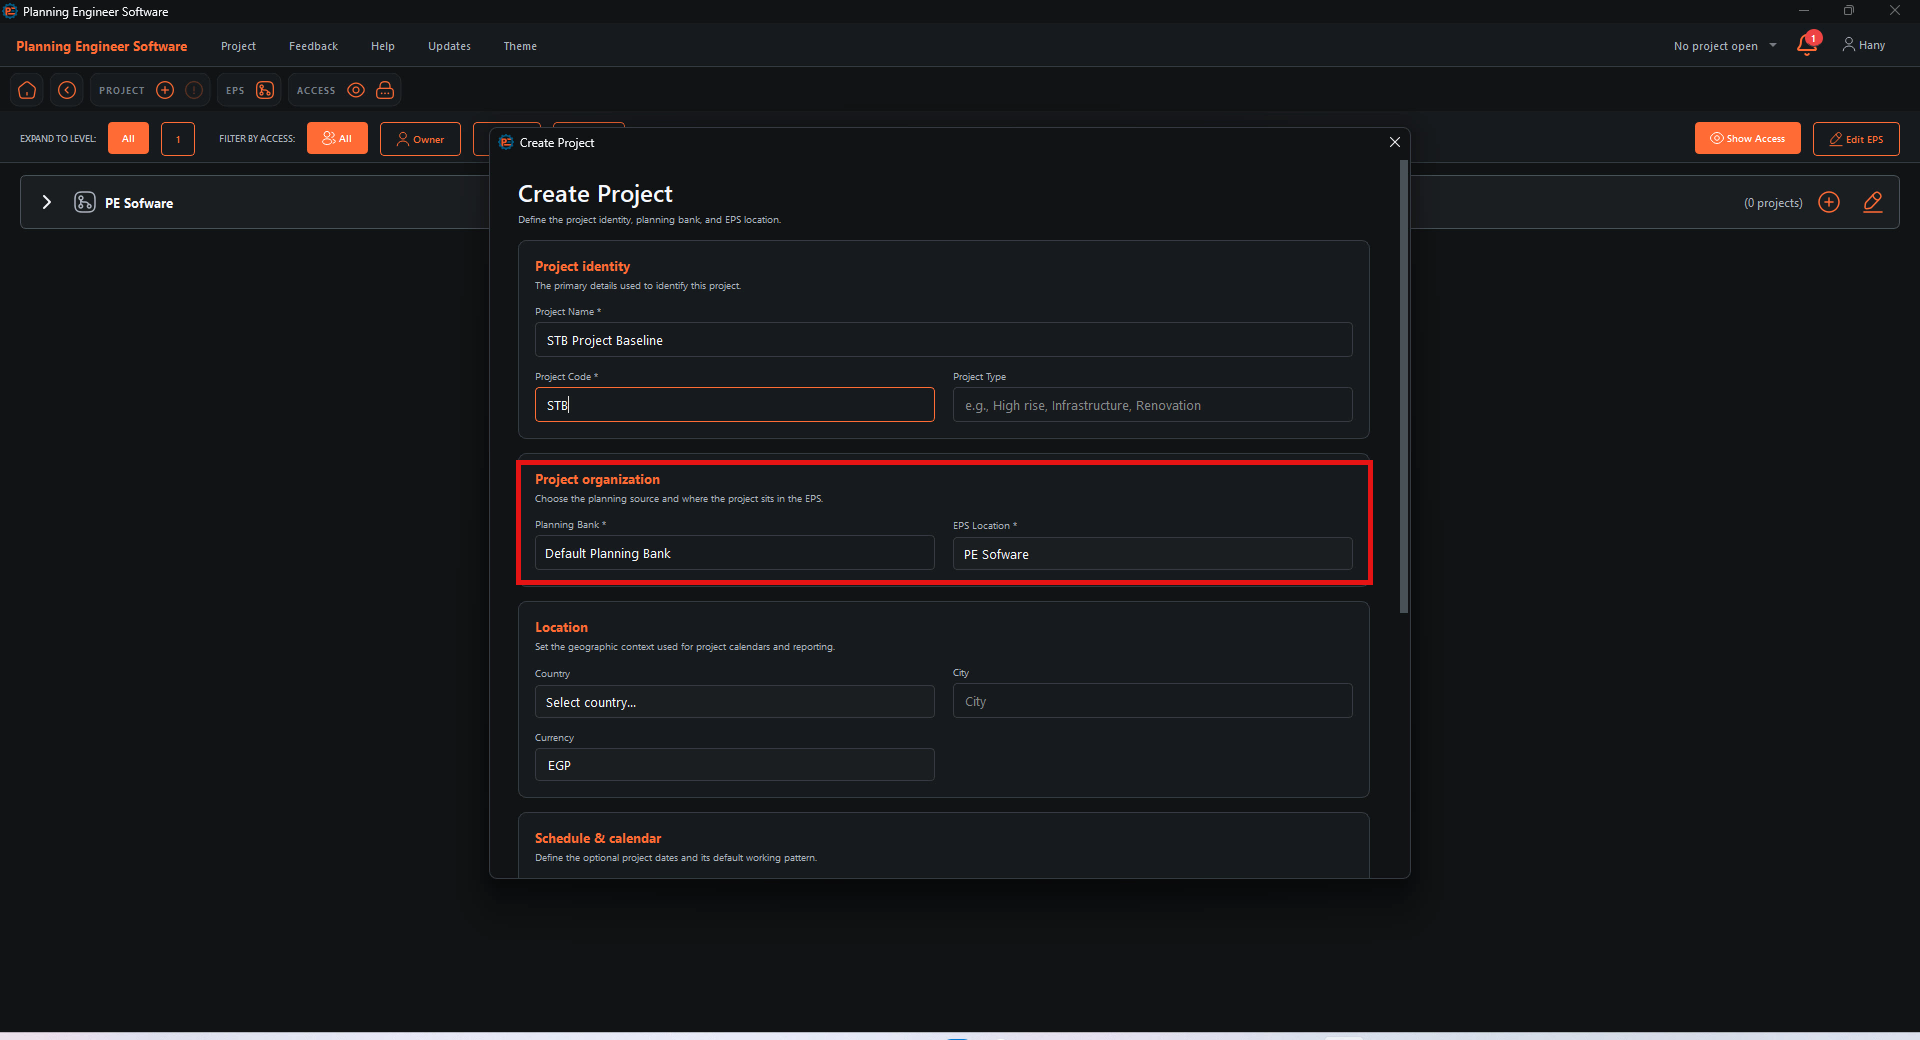
Project organization
Choose the Planning Bank and select your EPS Location.
Tip: The Default Planning Bank cannot be edited. Use a copy of it if you want to build your own relationships and norms.
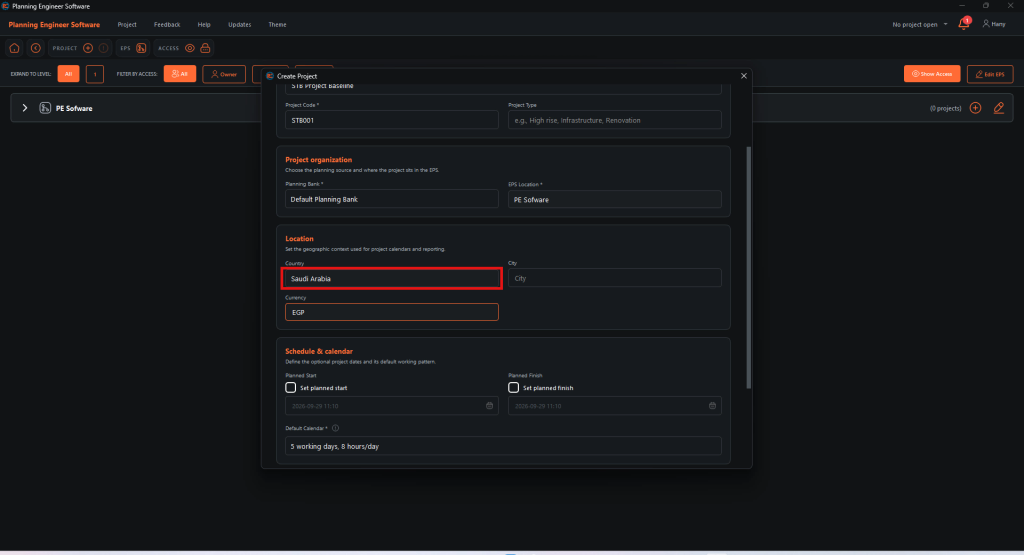
Location
Select the project Country. City and Currency are optional.
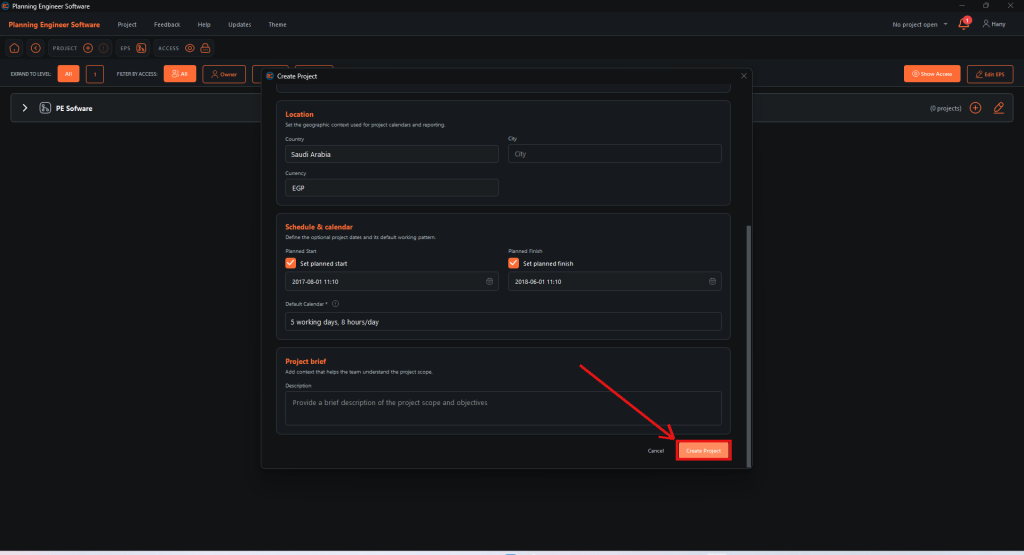
Schedule and calendar
Tick Set planned start and Set planned finish, enter the dates, and choose the Default Calendar.

Create the project
Click Create Project.
Your project is created
Your project now appears under its EPS. Click Open to start working on it.

How to Create a New Project?
Create your EPS and your first project
Guide 4 of 9 in Tips & Tricks